Summary:
Disk Utility is an app that comes with your Mac. Disk Utility and its First Aid feature can be used to check if a disk is damaged, create a disk image, partition a drive, and so much more... This article will provide you the effective method to Repair disk using Disk Utility on Mac without losing data.
What is Disk Utility?
Disk Utility is an application built into OS X that can perform lots of useful actions. Experienced users often need this handy tool. Today we're going to take a very brief look at what Disk Utility is, when you should use it and how to use it to fix some disk issues.
Open your Applications folder, and it's nowhere in sight. Or hit Command-Shift-U to launch the Utility folder from Finder quickly.
Why use Disk Utility
You might want to use Disk Utility if you experience the following:
● Your computer won't startup.
● An external device won't work.
● Apps are quitting unexpectedly.
● You have a corrupted file.
● Need to mount, unmount, or eject a disk.
● Change the file system - for example, to enable or disable journaling.
● You think that there is a problem with your startup disk.
● Repair a disk that is damaged.
● To erase, format, or partition a disk.
● Disk Utility used to be used to verify and repair permissions, but since
● El Capitan, this is unnecessary.
The Features of Disk Utility
1. Disk Utility is used to erase, format, or manage internal disks and external storage devices.
2. Add and control volumes, or if you want to organize your data into partitions.
3. Disk Utility can be useful if you are working with RAID sets. Combining multiple disks into a RAID set that acts as a single disk can increase performance, reliability, and storage space.
4. Create a disk image of files that you want to move to a different computer,
5. Diagnose and fix problems with a disk or damaged volumes.
Note: Before you use Disk Utility on mac, you'd better back up all critical data, then perform the Disk Utility erased files recovery on Mac. If you mistakenly delete important files using the Disk Utility tool, we still recommend that you install the recovery software. Before the data is overwritten, you'd better install the recovery software on an external hard drive or a Partition that can be used frequently, and perform the data recovery on Mac quickly.
How to use Disk Utility on a Mac
Want to know how to use Disk Utility on a Mac to repair disk, you should refer to https://www.macworld.co.uk/how-to/mac-software/how-use-disk-utility-3634604/
How to recover data from mac disk?
When your essential data is lost by used Disk Utility on mac, you can recover it with the help of Bitwar Data Recovery. It is a hard drive recovery tool for mac to retrieve the lost contents. Since it is compatible with any devices such as Hard Drive, Removable Disks, Flash Drives, Memory Cards, digital camera, etc., from these devices you can recover audios, videos, pictures, archives, compress files, and documents.
How to recover lost files with Bitwar Data Recovery for Mac
Download and install Bitwar Data Recovery on your Mac OS X by clicking the icon below, and then launch it. The software is compatible with OS X 10.11 and later.
Tips: For the latest macOS 10.13 (High Sierra) system requirements, Mac users are not allowed access to system disk from apps. If you want to recover data from the system disk, please disable the system feature "System Integrity Protection (SIP)," see the guide on How to Disable System Integrity Protection (SIP) in macOS High Sierra (macOS 10.13)?
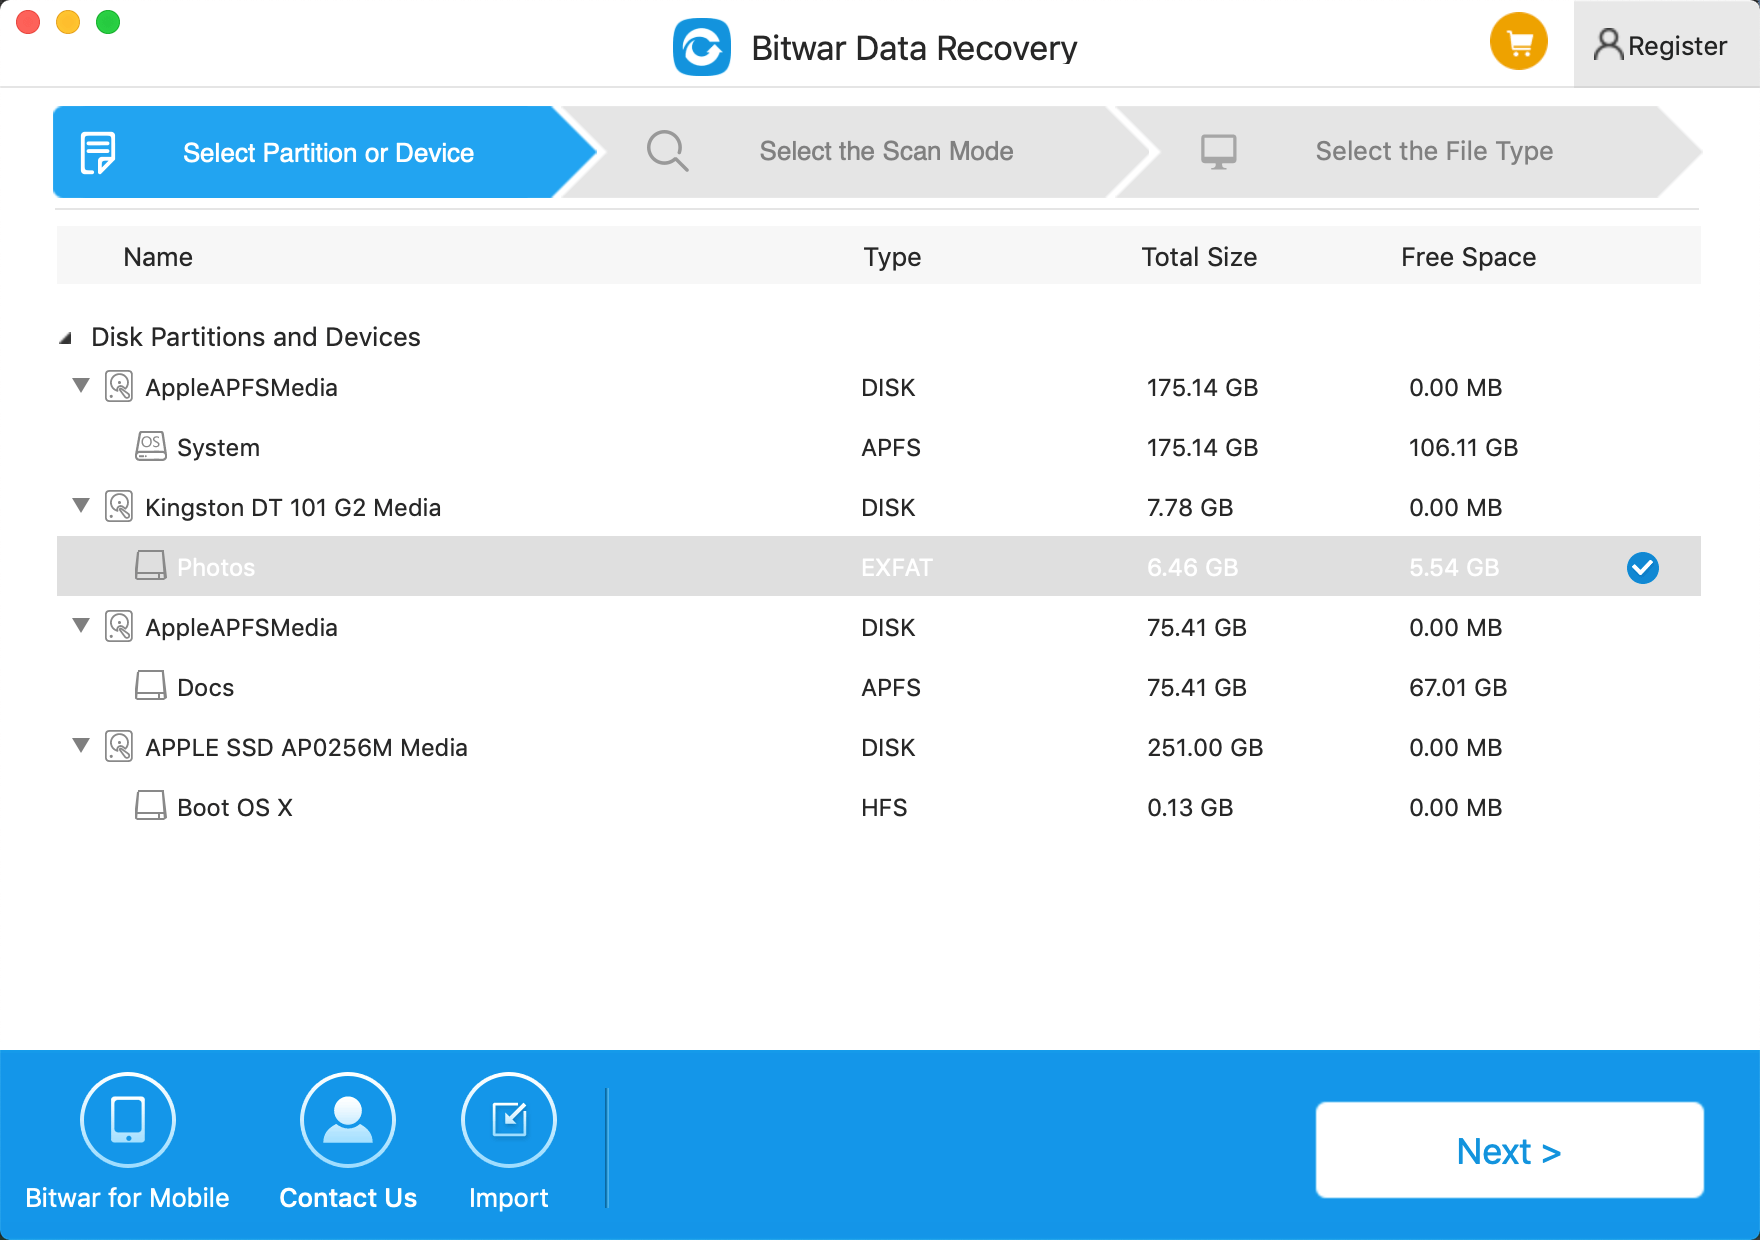
Step 1: Launch the program
Select the partition/devices where your data lost and then click "Next." If you want to recover data from an external drive, please connect it to your mac and select it on this step.

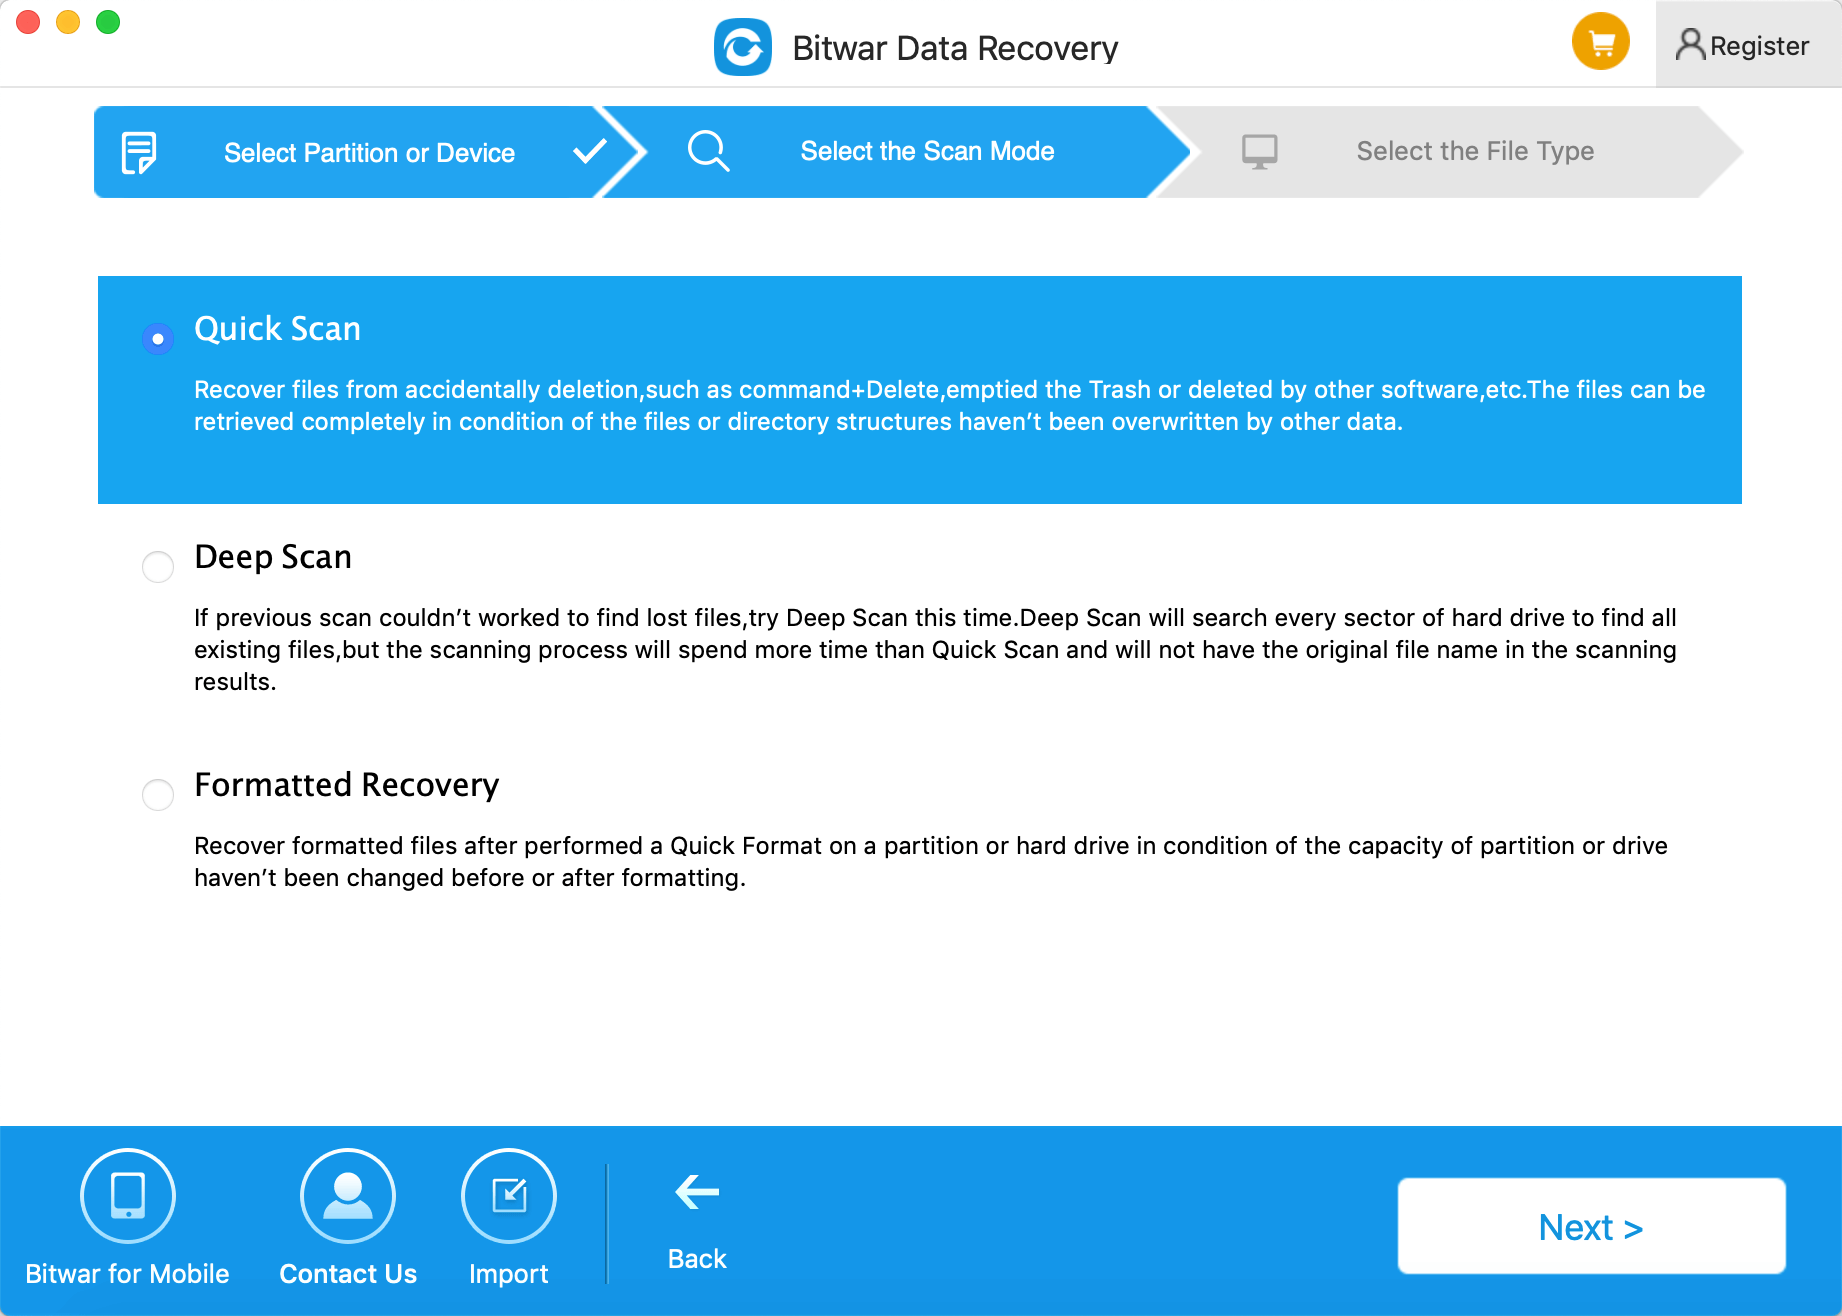
Step 2: Select the scan mode
Select the scan mode according to the exact data loss reasons. Then click "next." There is three scan mode for you choose:
● The quick Scan mode can recover deleted files on a partition or device, such as files deleted by Command + delete, emptied from the trash or removed by other software, etc. If additional data have not overwritten files, it can be retrieved entirely in the condition of the files or directory structures.
● Formatted Recovery: Recover formatted files after performed a quick format on a partition or hard drive in the condition of the capacity of separation or drive hasn't been changed before or after formatting.
● Deep scan: If the previous scan couldn't work to find lost files, try Deep Scan this time. Deep Scan will search every sector of the hard drive to find all existing data, but the scanning process will spend more time than Quick Scan and will not have the original file name in the scanning results.

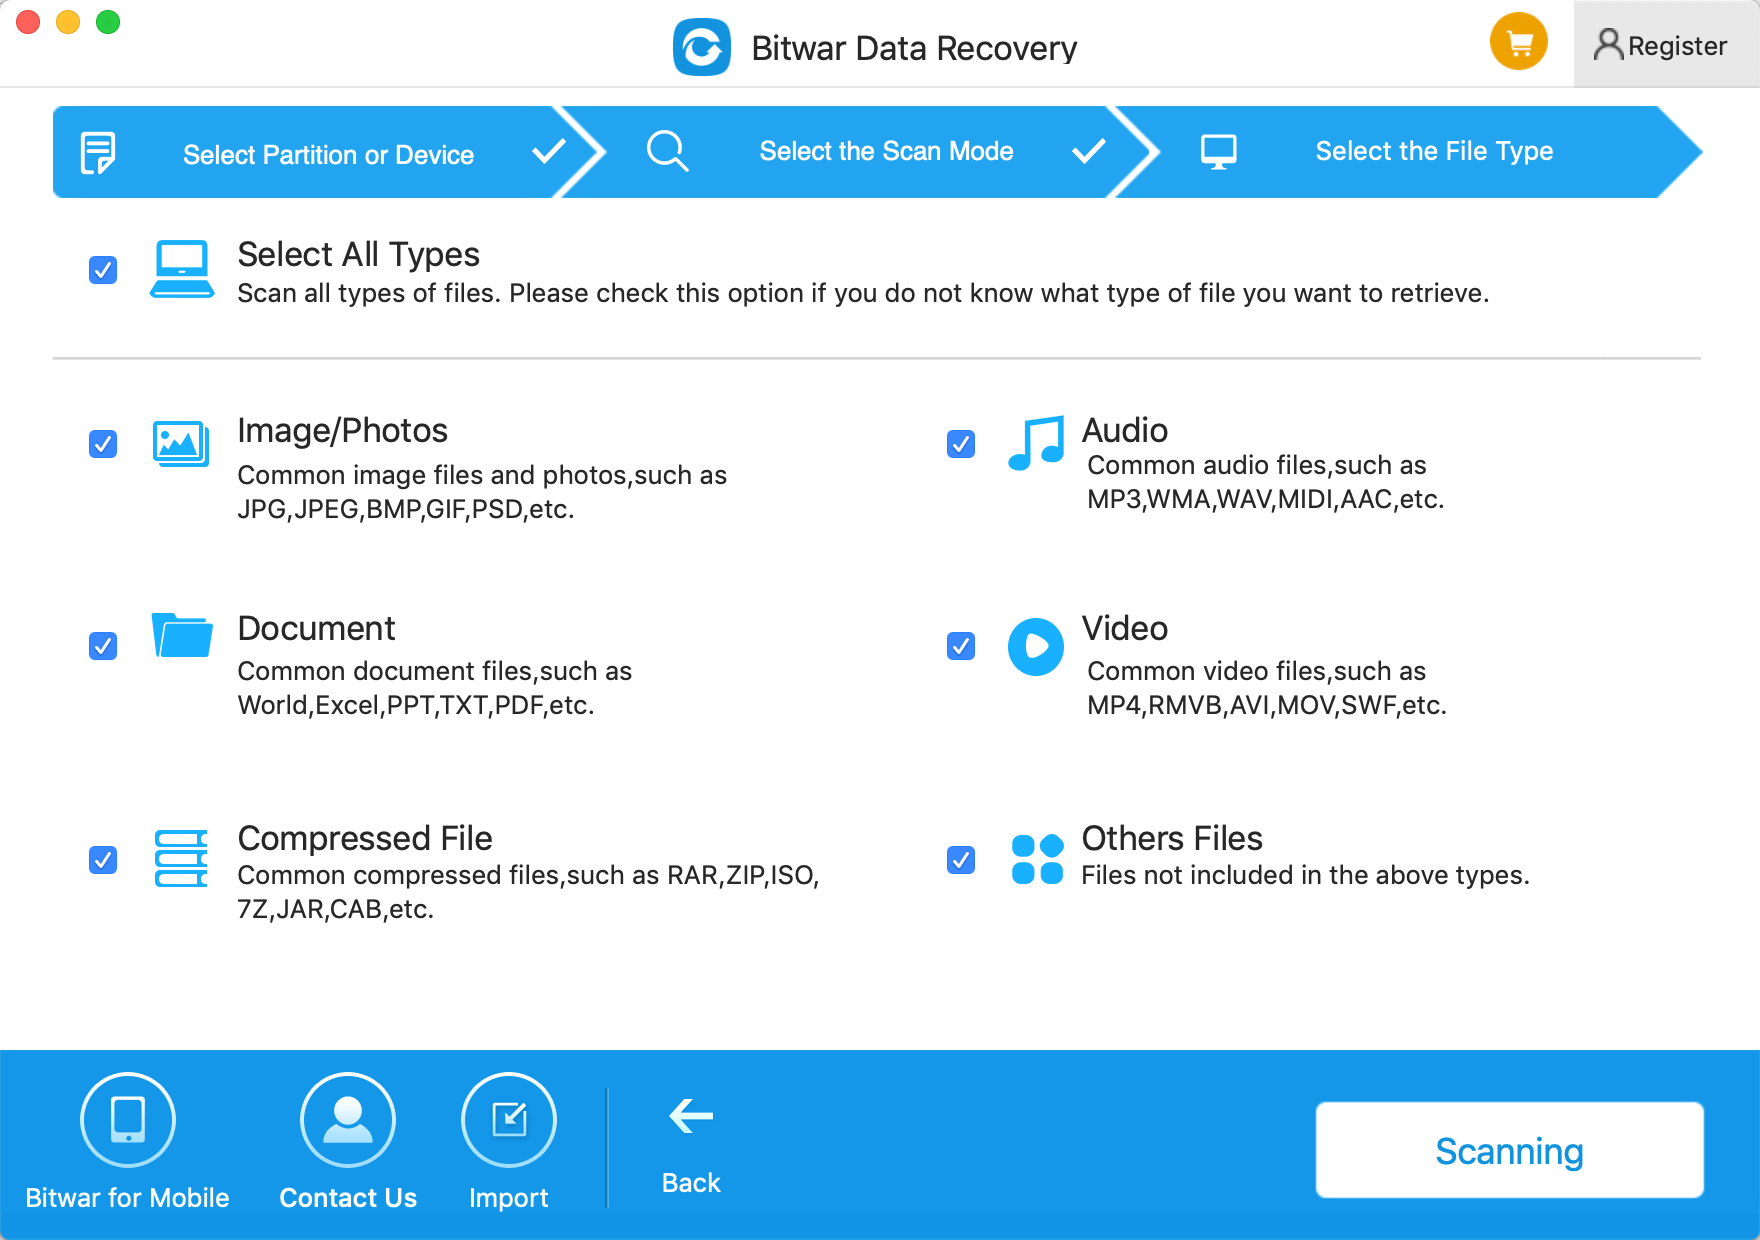
Step 3: Choose the file types
Choose a specific type of files or select all files.

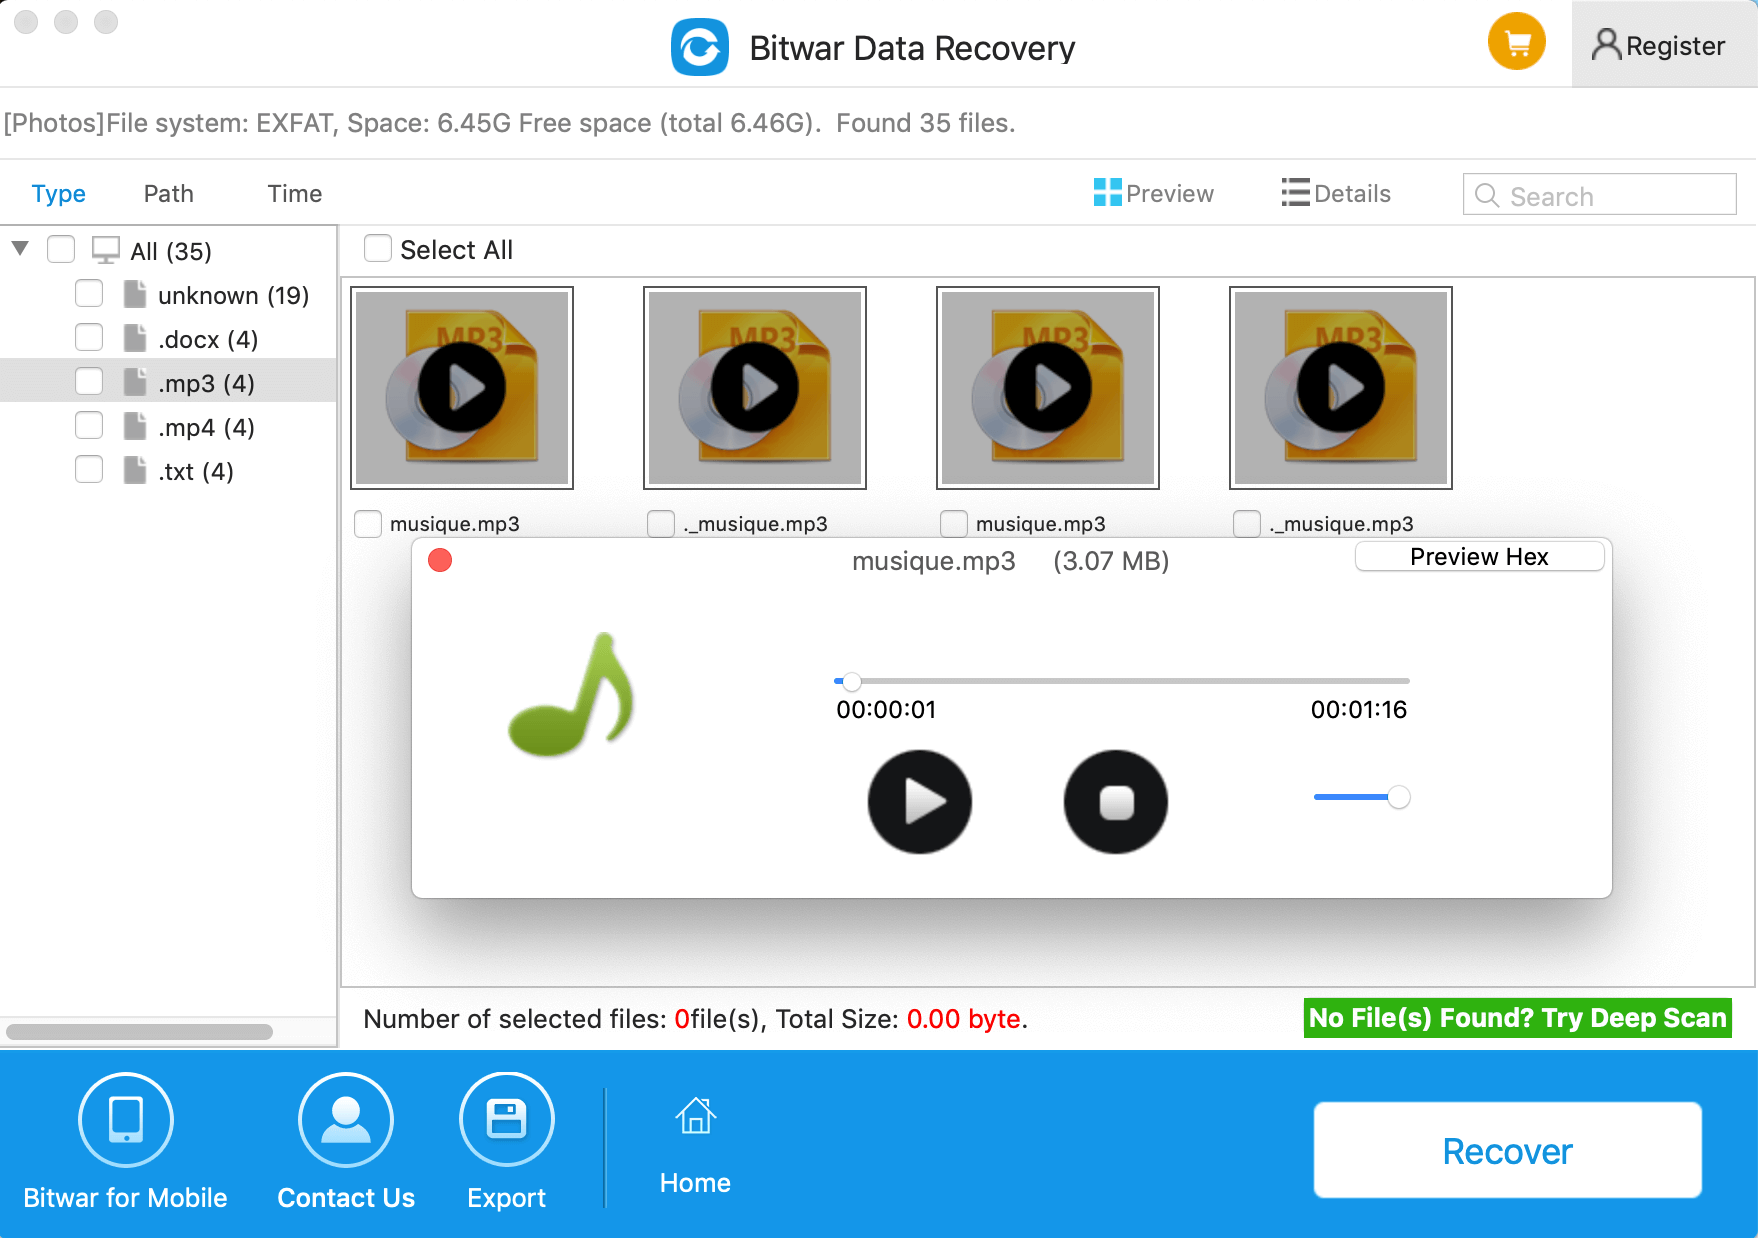
Step 4: preview and recovery
After scanning, by file name and Type, you can quickly filter the data you want and preview them. Then select the ones you want and press the "Recover" button to have them saved on the Mac.
Tips: Please DO NOT save the data into the Partition or device where you deleted it from.

Conclusion
By doing the above steps, files erased by Disk Utility on Mac have come back. Bitwar Data Recovery makes data recovery an easy thing. Do not hesitate to choose Bitwar Data Recovery when you encounter data loss issues.
This article is original, reproduce the article should indicate the source URL:
http://adminweb.bitwar.nethttps://www.bitwar.net/1477.html
Keywords:mac disk utility


