Summary:
Have you ever encountered that Windows PC does not start properly after being booted? It may happen after a sudden power failure or upgrading the PC to a newer version. How to fix Windows PC does not start properly and recover data from an unbootable computer efficiently and safely? You can find answers on this page.

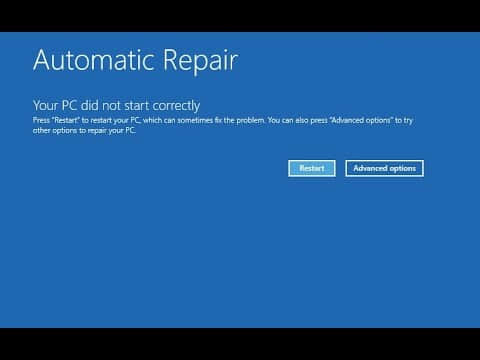
Sometimes, Windows 10 doesn't start the way as it always is after booting, and an Automatic Repair, Your PC did not start correctly." error occurs. There are a number of reasons that can cause "your PC did not start correctly", these troubleshooting steps may help you resolve the issue.
Ways to fix PC Did Not Start Correctly
Solution 1: Restart your PC
The first recommendation is to restart your PC. But sometimes, this problem may still exist even after multiple rebooting.
Solution 2: Safe Mode/Startup repair
A safe Mode is a troubleshooting option for Windows that starts your PC in a limited state. Follow these steps:
Go to the Start Menu and type Update and recovery. Click on Update and Recovery and go to Recovery. Under Advanced startup, click Restart now.
In case you're unable to login to your PC or if it's stuck on the lock screen, turn to the following steps:
Click on the power button while holding the Shift > click Restart, then click Troubleshoot on the Choose an option screen,
Click on Startup Settings > Restart.
Choose the Safe Mode and then run Startup Repair from Advance boot option:
Press and hold Shift then click on Restart, click on Troubleshoot > Advanced Options> Startup Repair to repair your Windows 10.
Solution 3: Run system file checker
The sfc/scannow command acts as a troubleshooter for various system-related issues and might be useful in this case, as well. If you don't know how to run the sfc/scannow command, follow these instructions:
1. Go to Search, type cmd, right-click Command Prompt, and select Run as administrator
2. Enter the following command, and press Enter: sfc/scannow
3. Wait for the process to finish
Solution 4: Disable antivirus
There are some reports that suggest your antivirus causes the problem. That's actually a common thing in Windows 10, as the system is known for interfering with third-party antivirus software. Although Windows 10-antivirus interference mainly affects the way they're installed, there could be a system error here and there. So, try pausing your antivirus protection for some times.
Solution 5: Restore system
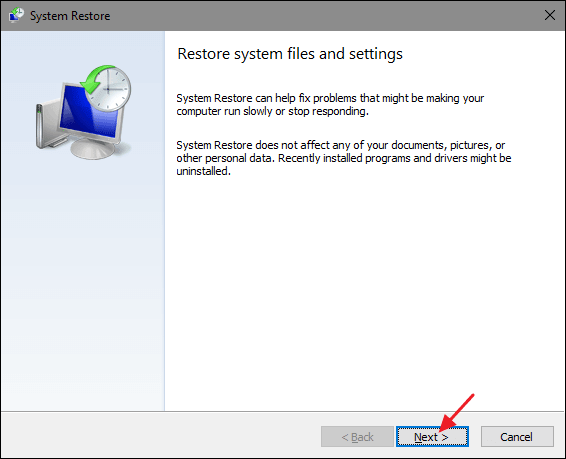
There's a chance that some unwanted changes are made on your computer. For that situation, there's no better option than system restore! If you need to rewind your system to a previous working version, system restore is the most logical solution. If you have a proper restore point it won't take too much time to perform a time-traveling procedure in Windows 10.
If you're not sure how to perform System Restore in Windows, follow these steps:
1. Right-click the Start menu and open Control Panel.
2. In the Category view, open System and Security.
3. Click File History and then open Recovery from the bottom left.
4. Click on Open System Restore.
5. Click Next until you can see the list of the available Restore Points.
6. Confirm the selection and start with the restoring procedure.

Solution 6: Delete updates
If this error occurs after the latest updating, you need to uninstall and revert it to the previous working version of the system. Here's what you need to do to restore system updates:
1. Go to Settings > Updates & Security > Windows Update
2. Go to Update history > Uninstall updates
3. Now, find the latest update installed on your computer (you can sort updates by date), right-click it. Then go to Uninstall and finally restart your computer
Solution 7: Rebuild BCD
As we know, you will encounter the "PC did not start correctly" error message in Windows 10/8/7 once the Boot Configuration Data is corrupted. Now, please try rebuilding the Windows’s BCD.
1. Insert the Windows bootable drive and boot from it
2. Click Repair your computer >Troubleshoot >Command Prompt.
3. Type bootrec /fixmbrand press Enter.
4. Type bootrec /fixbootand press Enter.
5. Type bootrec /rebuildbcdand press Enter.
6. Type exitand press Enter.
7. Finally, restart your PC.
Solution 8: Reset Your PC
If your PC did not start correctly and the issue still exists after trying the above 7 solutions, you might have to try performing a Reset or Refresh to troubleshoot the issue.
In the Windows Boot Options menu, choose Troubleshoot and "Reset your PC" or "Refresh your PC."
No matter which solution you choose, you may suffer from data loss during the fixing process. It is recommended to recover all the precious data before solving this problem. But if you forget to make a backup in advance, Bitwar Data Recovery Software can help you retrieve the lost data quickly and effectively.
How to recover lost data when PC won't boot
If you have more than 2 systems installed on your computer, you can use another system to back up or recover data. Or you can remove the hard drive and connect it to another computer for recovery.
Download Bitwar data recovery by clicking the button below and install it.
Step 1. Launch Bitwar Data Recovery software and select the partition or device and then click "Next".
Step 2. There are three modes to scan your data out, select a scan mode based on the reason of data loss.
Step 3. Select the file types you want and click Next to start scanning.
Step 4. After the scan, find the files you want and preview them one by one. Then choose the file you want and click the "Recover" button to save it to an external device or another partition.

After following the solutions, you can fix your pc did not start error successfully. If you worry about data loss because of mistaken operations during the process of fixing, you can use Bitwar Data Recovery to get data back in advance.
This article is original, reproduce the article should indicate the source URL:
http://adminweb.bitwar.nethttps://www.bitwar.net/1409.html
Keywords:PC Did Not Start Correctly


