
Summary:
This post offers solutions for solving the "Windows cannot access disk" issue and introduces the Bitwar Data Recovery to restore the losing data. If you are experiencing such problem, you can find solutions here.
When trying to start a program or open a file on your Windows computer, you may receive the error of "Windows cannot access the specified device, path, or file. You may not have the appropriate permission to access the item." In the worst case, it could lead to data loss. However, what are the possible causes of this problem, why don't you currently have permission to access the folder, and what should you do to make sure that you are not lose programs and files?
Fix "Windows cannot access the disk" issue
Solution 1: Check disk connection
1. Make sure all cables are properly connected between storage devices and computer.
2. As to external hard drives, you can try unplug disk or different cable on different USB port. Then restart computer.
3. Make sure USB port does not have power supply issue, as insufficient power supply tends to cause inaccessible drive.
Solution 2: Change the drive letter assigned to the affected hard drive
The most effective method that users in similar circumstances have used to successfully get rid of the "the disk check could not be performed because Windows cannot access the disk." error is changing the drive letter assigned to the affected hard drive.
1. Press the Windows Logo key + R to open a Run dialog.
2. Type diskmgmt.msc into the Run dialog and press Enter to launch the Disk Management utility.
3. in the list of drives connected to your computer, locate and right-click on the affected external hard drive, and click on Change Drive Letter and Paths….
4. In the window that pops up, click on the current drive letter assigned to the drive to select it and click on Change.
5. Open the dropdown menu located directly in front of Assign the following drive letter: and click on whatever new drive letter you want to be assigned to the drive to select it.
6. Click on OK.
7. Click on OK in the Change Drive Letter and Paths for X: () window.
8. Close the Disk Management utility and restart your computer.
9. When the computer boots up, try running CHKDSK on the affected external hard drive and check to see if the problem persists.
Solution 3: Run check disk in Command Prompt
1. Open an elevated Command Prompt. Click Start button and click All Programs and Accessories. Right-click Command Prompt and select "Run as administrator". If you are asked to provide password or confirmation, type password or click "Allow".
2. Type command G: in Command Prompt and press enter. Note: G: is the drive letter of the disk in question. Please replace it with the drive letter associated with your disk.
3. Type chkdsk /r and press Enter. If you are prompted to dismount and schedule chkdsk on next restart, then type Y and press enter.
4. Restart computer.
Note: If bad sectors are found on the hard drive and chkdsk tries to repair bad sectors, data on that drive might be lost.
The above solutions can fix the error of "Windows cannot access the disk". But if you don't back up the important data on the disk in advance, you will need to recover the lost data after the operation is fixed.
How to recover lost data?
You should recover lost data with a third-party data recovery software -- Bitwar Data Recovery software is designed to recover deleted, formatted or inaccessible files from Windows PC, laptop, hard drive, SSD, memory card, USB drive, SD card, digital camera, multimedia player and other storage devices.
Free download Bitwar Data Recovery software here and install it on your computer, then follow the steps to recover lost data.


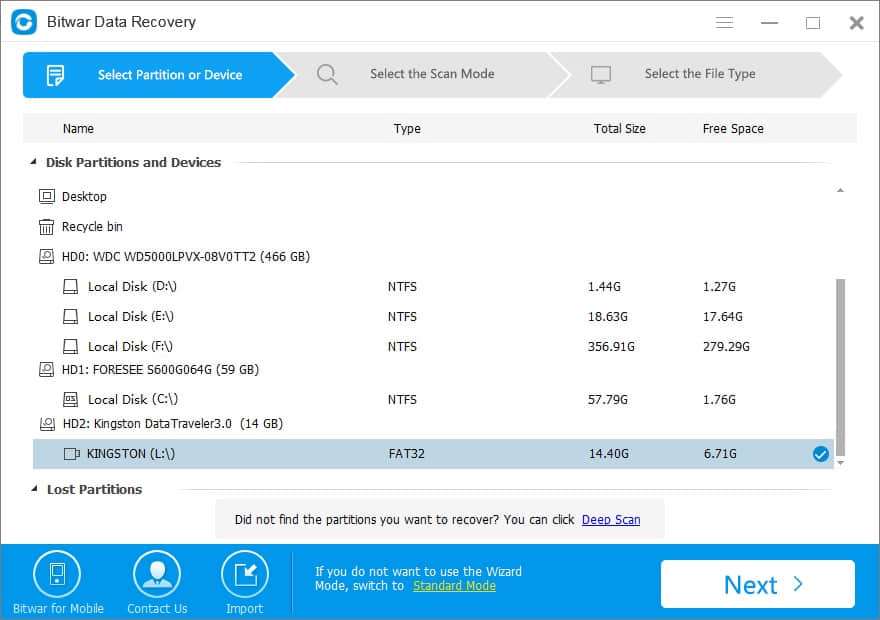
Step 1. Select your partition where your important data lost, then click "Next".
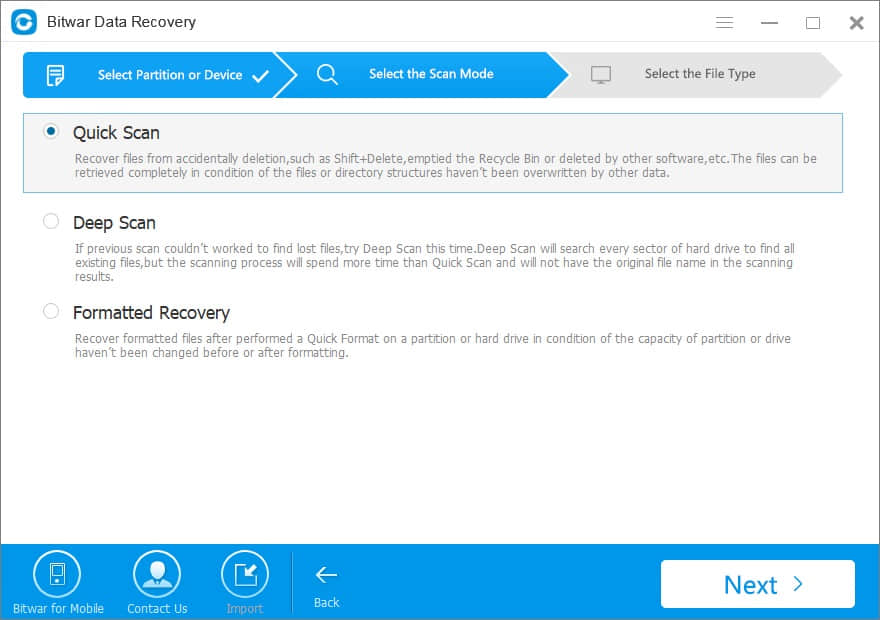
Step 2. Select the "Quick Scan" or "formatted recovery" mode first. However, if files are not found under quick scan, try "Deep Scan" this time.
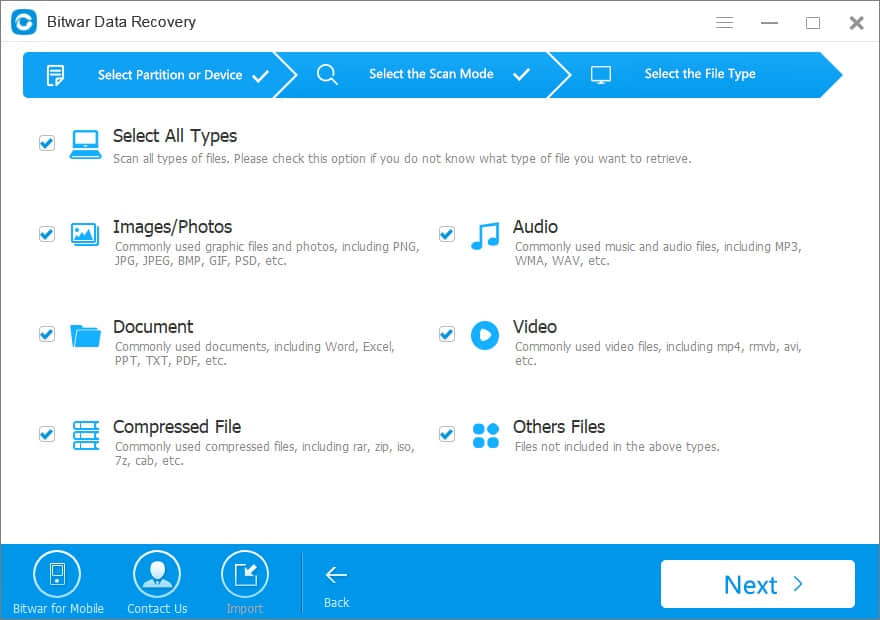
Step 3. Choose the exact types of files you want to recover, you can select all types if you have no idea about what type of file you want to recover.
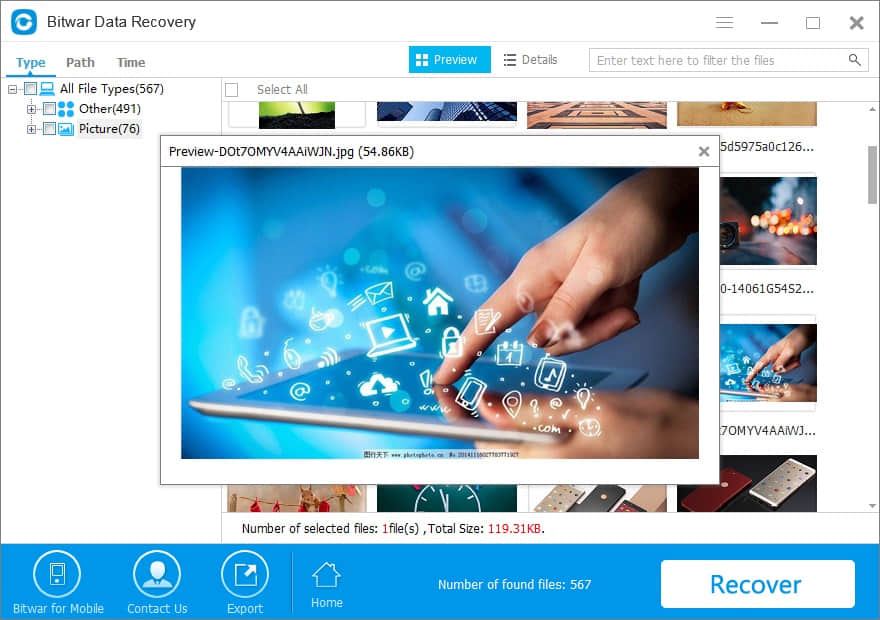
Step 4. After the scan, filter the file you want by file name, type, path, and time. Then you can preview the common types of files by double-clicking. When determined, choose the data you want and click "Recover" button to restore them back. Here, you'd better save all the recovered files to a different disk or device in case of data recovery failure.
All the provided fixes can be used to resolve the "Windows cannot access the disk" error. If data lost during the process, do not hesitate to restore your precious data with Bitwar Data Recovery software.
This article is original, reproduce the article should indicate the source URL:
http://adminweb.bitwar.nethttps://www.bitwar.net/1373.html
Keywords:Fix